Showing posts with label Windows 7. Show all posts

Saturday, August 15, 2015

How can I close not responding window or file?


           Now I am going to teach you an easy trick. I mean some time when you are working on a computer or laptop and want to shutdown your computer immediately but your computer hangs up and the window on which your working also not closing or not responding and your mouse also not working properly so that time your are facing difficulties.so what will you do to overcome this problem.. I know you will directly shutdown your computer.But no need to do this just follow below tips to over come your problem


1.First open the windows task manager option by pressing ctrl+Shift+ESc from your keyboard.
2.Now click on applications option from windows task manager.Now your all files on which your working          will highlighted.
3.Now at once click the not responding file.
4. After clicking on not responding file or highlighted file click on End task now you will see that your not responding window Imiddiately close..In this way you will close your not responding file and no need to shutdown directly.


Enjoy the yourself Thank you.
+

Thursday, August 6, 2015

How To Show the AM/PM Symbol in the System Tray Windows 7

Hello world today in this post i am being to how to show the AM/PM symbol in the system tray in to your operating system of windows 7 so If you want to get the AM/PM symbols to simplify things then you will need to make a few small changes. Its pretty easy to change the time format to show AM/PM, simply and carefully go through the following steps by steps
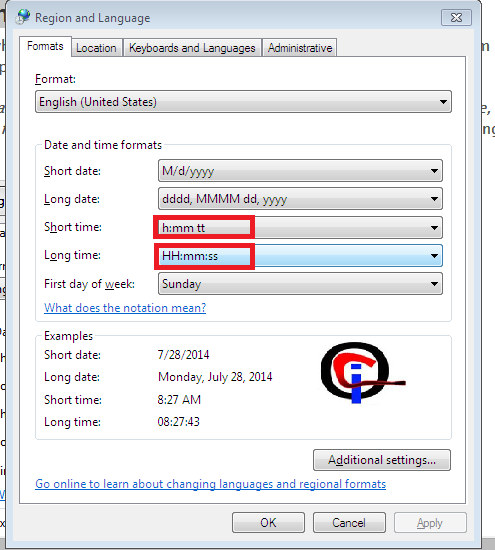
for example you can see screenshot of below different with between two picture left and right
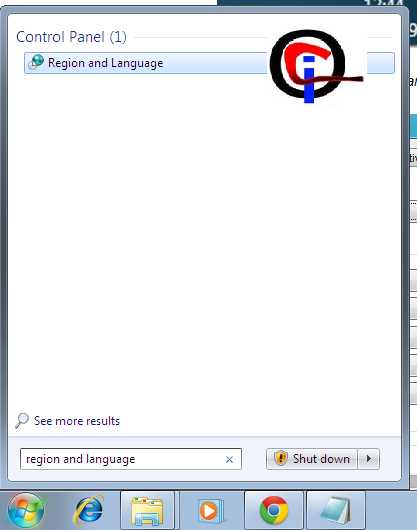
Click Start, button type "Region and Language" and Press Enter, then the Region and Language dialogue box will be displayed.
This is the Region and Language dialog box so now click the "Formats" tab in this window and set both the Short Time: and Long Time: values from HH:mm to HH:mm tt or any other values as your like
After finishing your settings click the Apply button and your system clock will now show AM or PM(whichever is applicable at the time) if your operating system is not Windows 7 and have windows XP, Vista or any other but don't worry you can do same tricks also in to your operating system.
+

How to Add Program to Startup Folder Windows 7 or Vista

   Hellow world! how are you? Some programs do not offer this option while they are installed. If you need to start any program when your Windows boots up, there is simple way to add any installed programs to the start up list so that you do not have to manually start it after Windows boots


In Windows 7, you have a “Startup” folder where links or shortcuts for programs which start at Windows boot up are placed. Using this folder you can start any program you need.


Before you get started, locate the program that you need to start when you boot up your machine.

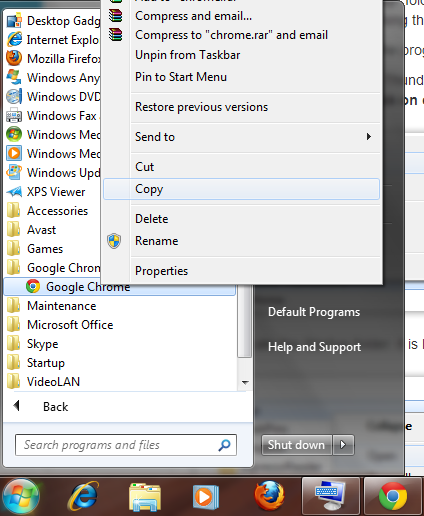
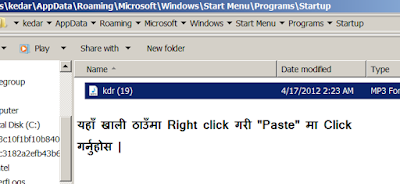
For example. If you would like Google Chrome to start up automatically, we locate it in the Start Menu and right-click and click on copy. if confused see at elow screenshot
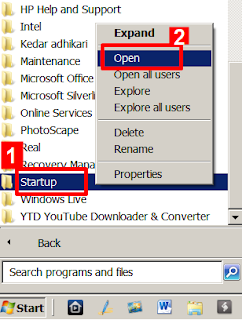
Now we locate the Startup folder. It is located in the Start Menu. Click on Start button and find it
1.. Now right-click on the Startup folder and click on “Open”. If you use multiple profiles on you Windows PC and want the program to start with every profile, click on “Open all users”.

When the folder opens you would see the shortcuts for other programs which start when Windows boots up.
Right click anywhere inside the folder and click on “Paste Shortcut”. Now you would see your desired shortcut in the startup folder.
Alternatively, you can also create a shortcut for any other program on the desktop and then paste it in the Startup folder. Make Sure you don’t paste the entire program, just paste the shortcut.
The next time when you restart Windows 7, the file or folder or program which you added will start automatically while booting i hope this is very usefull for you.
+

Wednesday, August 5, 2015

How To Share Files Between Computer Using HomeGroup in Windows 7

Hello world!!! If you have two or more PCs at your home or office  then you can easily create a HomeGroup in Windows 7, and share files and media between them using the networking feature. You can share images, videos and other documents very easily using this feature.

Before using this system you have to create a homegroup on one computer and join it from other computers. Once the process is complete, you can start sharing files and folders between those computers.

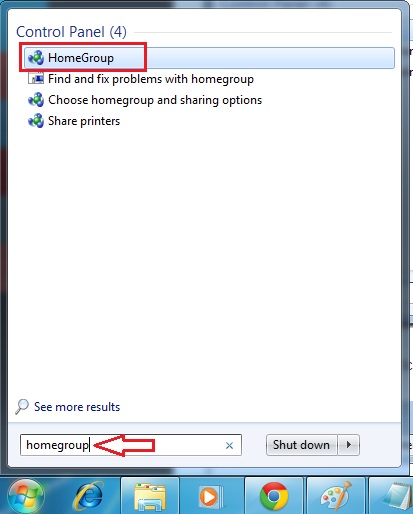
1. Click on the "Start" button and type "HomeGroup" in the search box. and Press Enter.

2. On the HomeGroup window, click on "Create a homegroup" button. and get new windows
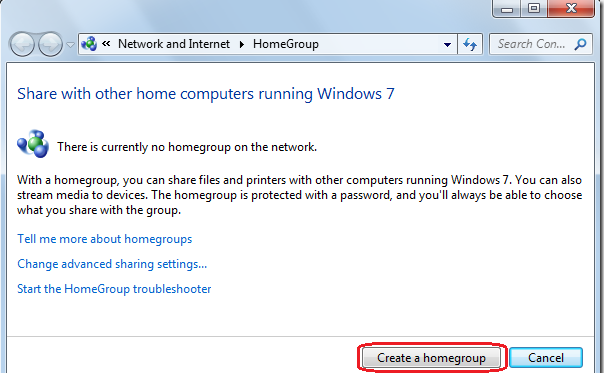
 

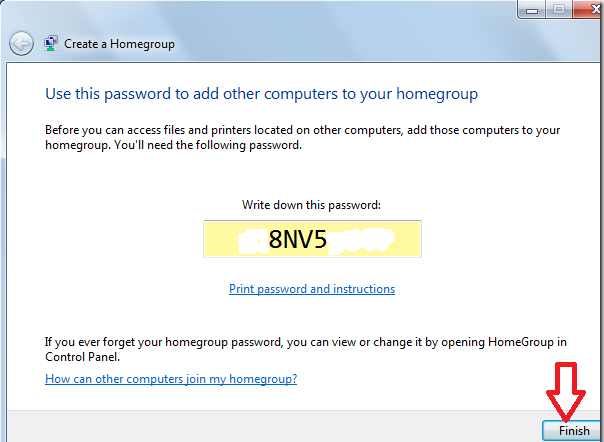
3.A password will appear on your screen. This password is needed at the time when you are connecting the other computer to your Homegroup. Write down the password or take a print of it. Click in to "Finish" button

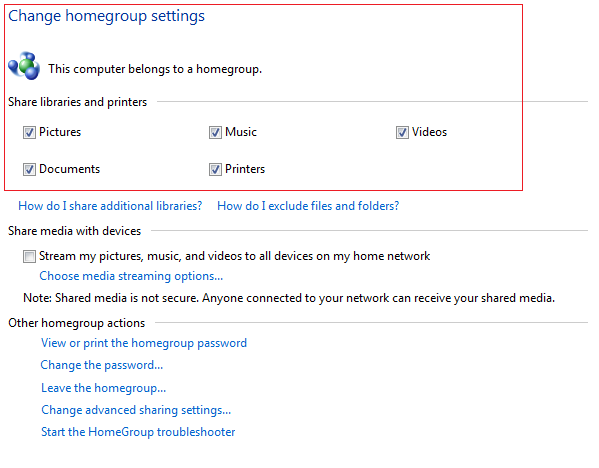
4. Now select the files how many you want to share. You can share library files and attached printer. Also you can stream pictures, music and videos to all the devices of your home network. After selecting your choice, click on "Save changes" button

5. Now lets be see bellow instruction how to join a Homegroup ?
For eample you have two computers or more then in your home. On the first computer you created a home group. Now you can join that homegroup on your second PC.

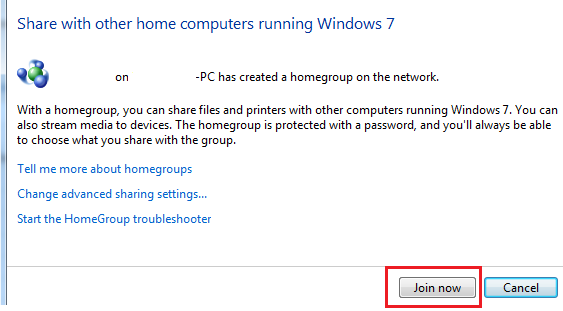
In the second computer, click on "Start" button and type "Homegroup" in the search box. and Press Enter key. A Homegroup screen will appear as shown in the screenshot below. Click on "Join now" button.

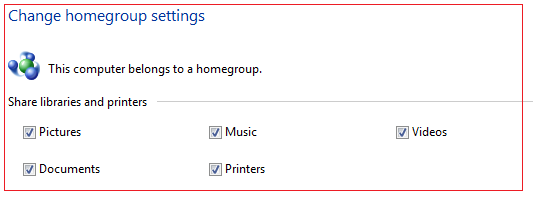
6. Now select the library folder how many you want to share. Here I am sharing my "Pictures, Music, Videos, Documents and Printers folder


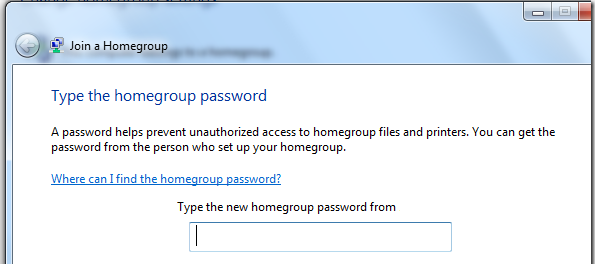
7. here is ask you to enter the password. Enter the password generated during creation of Homegroup in the first step, and click the "Next" button

8. After you have successfully joined the group, click "Finish"
9. Now, go to system explorer pressing by "Win logo+E" and click on "Homegroup" given on the left. The Category connected with Homegroup appears on the right. Click on it to access the shared files
Now you can copy paste in to given name inside of library which file or folder you want to share to another computer we hope you will be enjoy it thank you.
+